
In this article I will focus on how to say goodbye to your annuals for the winter season, and how to clean and store those potting containers for next spring!
This is the sister post to “Clean Plants Before Bringing Indoors,” which is about indoor over-wintering potted perennials that otherwise spend the warmer months outdoors on our patios.
I know, it is so exciting when spring finally arrives, and we are just itching to visit our local nurseries and bring home a trunk full of flowering annuals! (yes, this is the trunk of my car!…)
-R-min")
-min")
-R-min")
And it’s most helful to have a wagon (or two!) to wheel your treasures to your workstation!


Without hesitation or grumbling, we enthusiastically lug heavy bags of potting soil to the potting shed or work station with seeming super-human strength (it’s called adrenalin!)… we eagerly pull out our potting containers and don our gardening gloves! It’s spring! Glor-ious-ity! I have been known to fill 100 containers in my spring enthusiasm, so I know what I’m talking about, here! (posting photos of some of my spring containers below… any excuse to photo-jornal my plants!)


-R-min")

-R-min")
-R-min")
-min")
-R-min")


…But, I Digress!
Anyway, after we get everything potted in our containers we spend all summer lovingly nurturing our container plants; watering, deadheading. and pruning. Oh yes, and we take a lot of photos! We even host backyard parties just so our friends and family can admire our containers!
However, as summer comes to a close, many of our annuals are actually begging to be put out of their misery. Our waning enthusiasm for deadheading has resulted in our plants going to seed, and we begin to look forward to a dormant yard as fall approaches (crochet is beginning to sound pretty good right about now! Am I right?) What were we thinking, anyway? We can’t remember why on earth we planted so many containers! Once again, we’re faced with all those same containers, but now they need to be cleaned out and put away till next season. Ug. What a drag.

It’s no wonder that we approach the “putting away” stage with less enthusiasm. Who really wants to deal with a bunch of containers full of spent flowers and twisted sticks? Suddenly these same containers seem a whole lot heavier than they did in our spring exuberance!
“Huh. How on earth did I lift these containers to put them out in the spring?” I wonder…
Not to mention that the dried-out soil contains bugs and stuff! While we were busy floating in the pool… roaches, earwigs, and spiders were taking up residence in those containers! Eewww. I feel squeamish.
Okay, I will help you get through this chore!
For my region of residence (southeastern United States) the trick is to time this clean-up session (and the aforementioned “Bringing Plants Indoors” session) to take place after the scorching, humid temperature lets go, but before the first hard freeze. In Alabama, this usually leaves 2-3 weeks’ time (not much “fall!”)… so keep your eye on the 10-day forecast and make a plan!
An Aside (okay-two)
One year I succumbed to laziness and simply left all of my dormant containers outside for the winter. I did nothing to remove their contents or store them; I left them sitting right where they had been all summer. This was a mistake. What I didn’t consider was that the moisture in the soil would freeze and expand during a frost, and would cause my ceramic containers to crack and break! Yikes. I lost several of my favorite ceramic containers that winter.
The following year the first hard freeze snuck up on me before I could get my containers cleaned out and stored. All I had time to do shove them up under a small solarium, where I promptly forgot about them (out-of-sight-out-of-mind!). So with the dried out soil and craggy stems still in them, they became a nice home to all kinds of creepy critters for the winter. When I finally took them out of their hideaway for the following planting season, I had a run-in with a black widow who had taken up residence in the old, dry soil within one of the containers. No, no, no!
Do not let this be you this year; make a plan! You will hug yourself next spring when you are ready to plant your beloved annuals, and all of your pots are shiny and clean and ready to go! How pleasant!
Okay, Let’s Get Started!
How-To Video
Items to Have On-Hand:
Waterproof folding table(s)/work surface
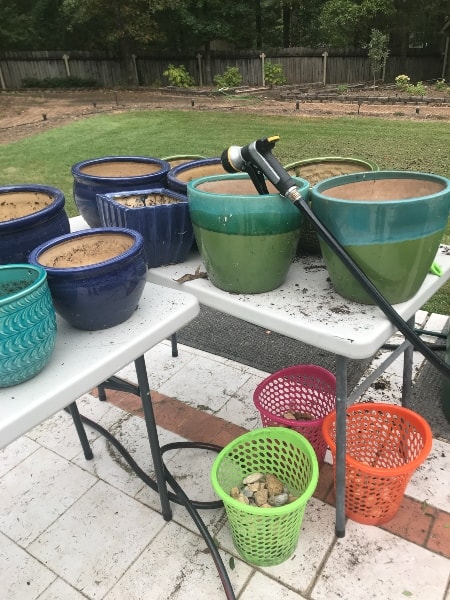
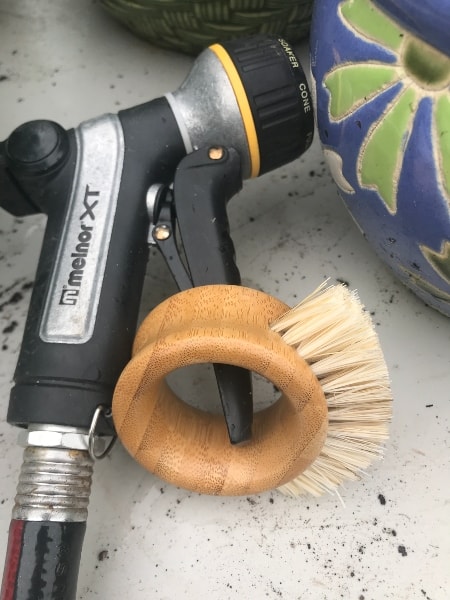
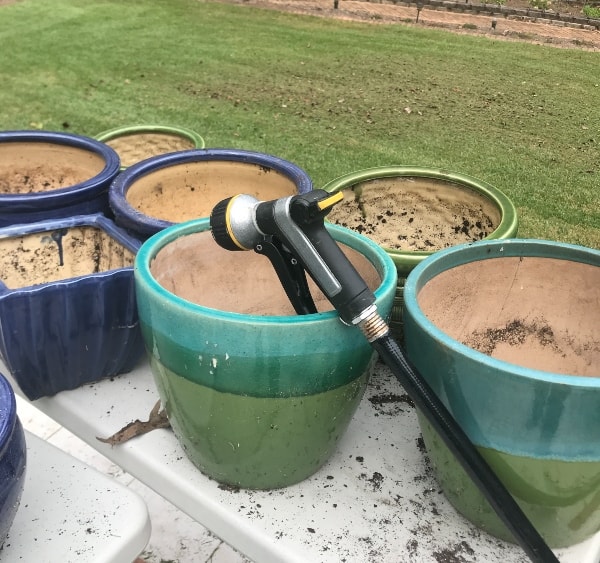
Hose with sprayer nozzle
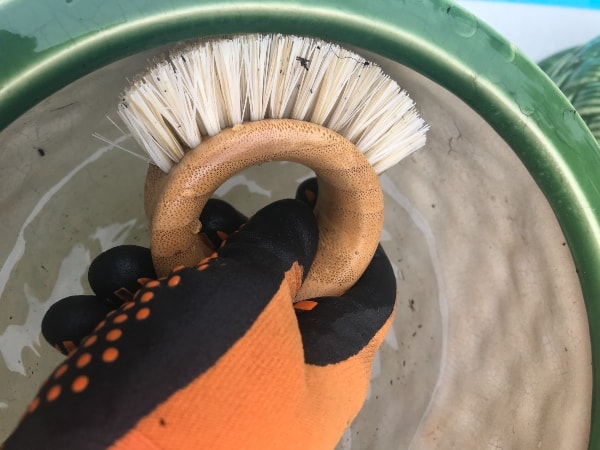
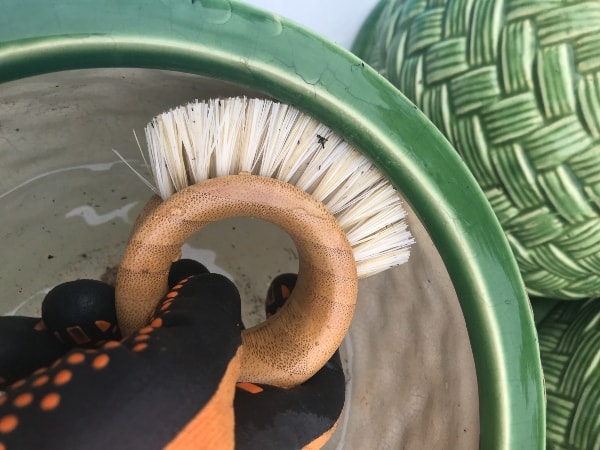
Palm brush (curved works best for round pots!)
Utility/trash can
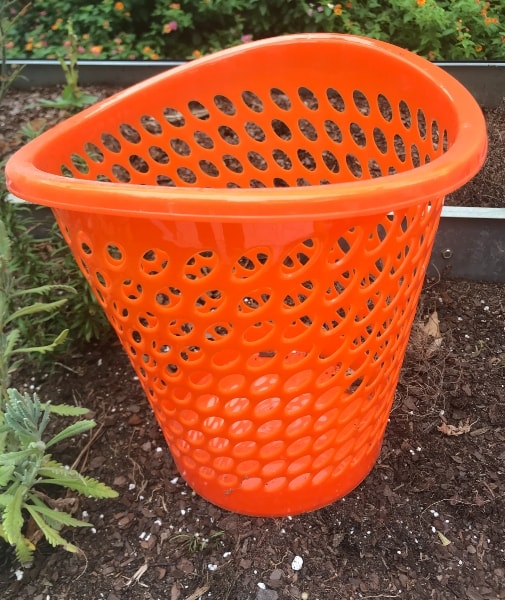
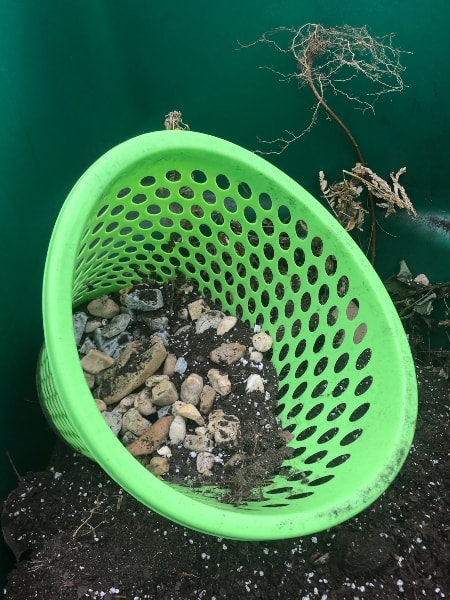
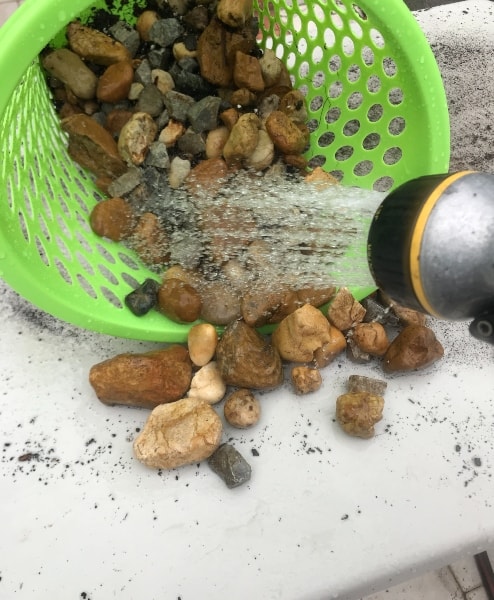
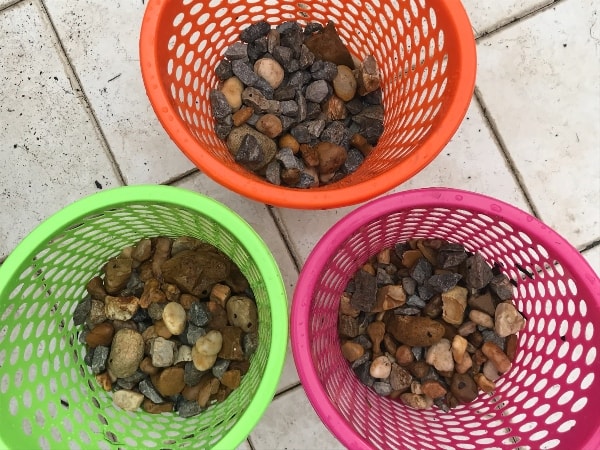
Small plastic baskets with holes on the sides (I got mine from Dollar Tree). This is for sifting out old dirt while keeping the rocks.
Gloves
Trowel
Steps
Remove plant stem and roots from pot; discard.
Loosen remaining soil with your fingers or with a trowel.
Set small plastic basket (the one with holes in the sides) inside the large trash can.
Carefully empty the top half of the soil from potting container into trash can (be careful not to toss any rocks that are in the bottom of the potting container! You want to keep these!)…
Empty the bottom half of soil/rocks mixture from potting container into the plastic basket (which is sitting inside the trash can), allowing soil to pass through the holes in the sides of the baskets into the trash can, and keeping the rocks on the inside of the plastic basket.
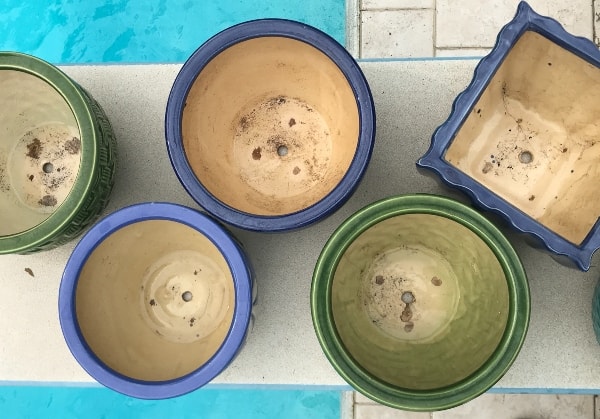
Loosen and discard any remaining soil in the pot that may be stuck to the sides or in the rim of the pot.
Use the hose/water to soften soil remnants on the inside of the pot (and on the outside too!).
Use palm brush to clean all soil remnants from the pot; rinse.
Repeat with all pots.
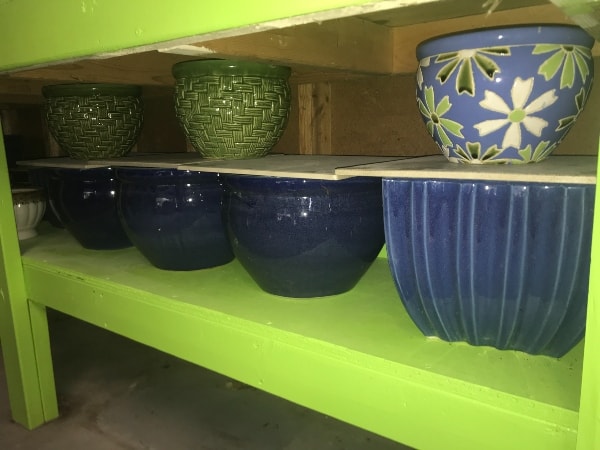
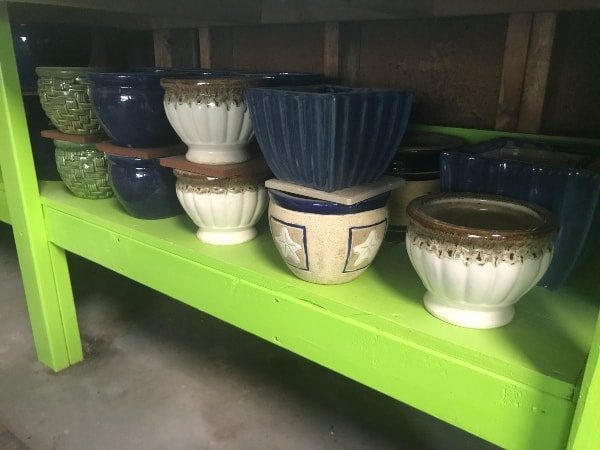
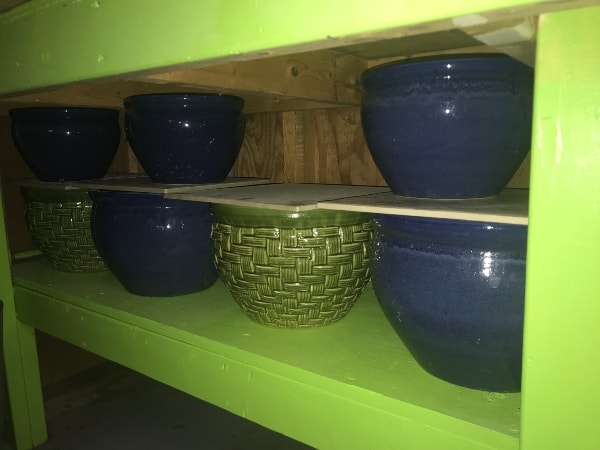
Allow to fully dry, inside and out.
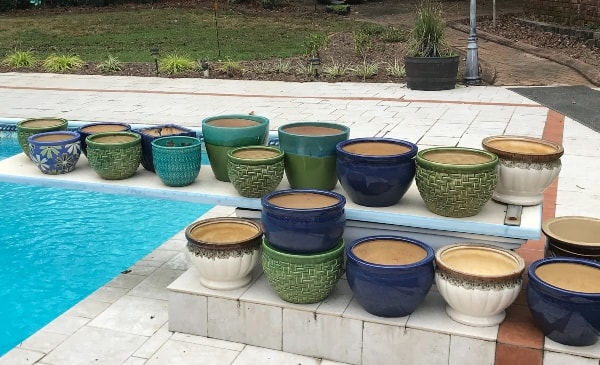
Store in a dry place for the winter!
Use hose to wash soil from inside the plastic container of rocks, leaving clean rocks inside the basket for re-use next spring!
Great blog post! Thanks
Beautiful plants and article!