
No other home improvement project lends itself to the feeling of a renewed lease on life more than an updated kitchen! Aahhhh.
Hang onto that “aahhh.” You’re going to need it later! Meantime, you’ve got a big job ahead of you!
But never fear… PLAN to spend many, many days on this project, and break it up into manageable bites. According to the dates on my photos, our kitchen was torn apart from March 11 to April 2. And while I did all of the sanding and painting, my husband helped me with all of the taking-down and putting-back up of the cabinet doors and drawers. He took off all the old hardware and attached the new hardware when it was time. While I was busy sanding or painting, he made numerous Lowe’s runs for “one more” can of cabinet enamel, more brushes, more rollers, more sandpaper… and on and on!
So, if you’re doing this by yourself, add more time to your plan! Between the two of us we got it accomplished in 3 weeks. We primarily worked on weekends, but I took off some days from work here and there to keep it going!
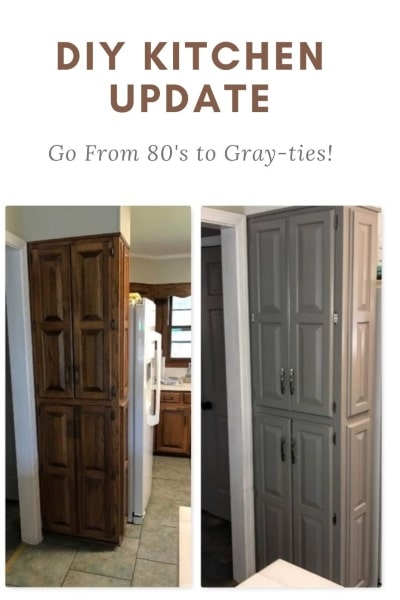
Don’t do your kitchen, first, if you have an opportunity to practice on some other cabinets in your home that aren’t so “center stage!” Our house is outfitted with the same cabinetry throughout, so I chose a small bathroom to practice on before I braved the kitchen! I used a different color than I chose for the kitchen, but I used the Valspar CABINET ENAMEL (very important!) and it turned out beautiful!
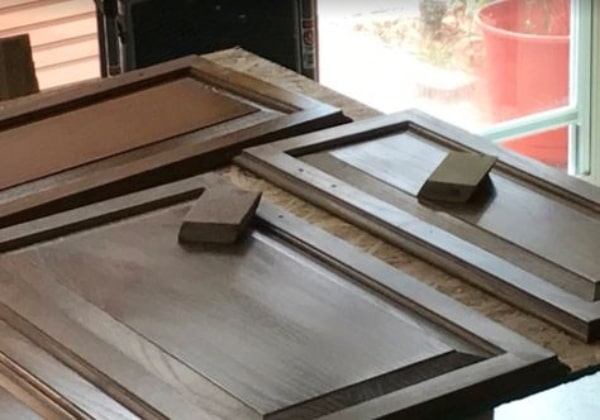
Side bar: I had refinished the cabinets in two other kitchens in previous homes, using paint. My husband had never been 100% pleased with the painted finish… the inevitable brush strokes bothered him. This time around we used cabinet enamel designed to minimize the dried brush stroke texture. This is the ticket! The enamel gives color coverage but allows the grain of the wood to show through! Perfect!
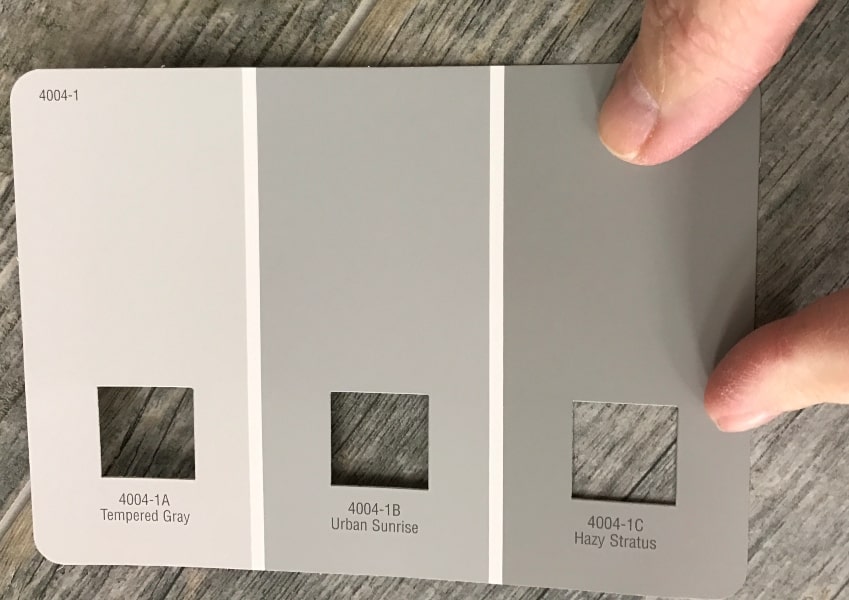
Look at this:
See the Grain?
Three important decisions to make in advance:
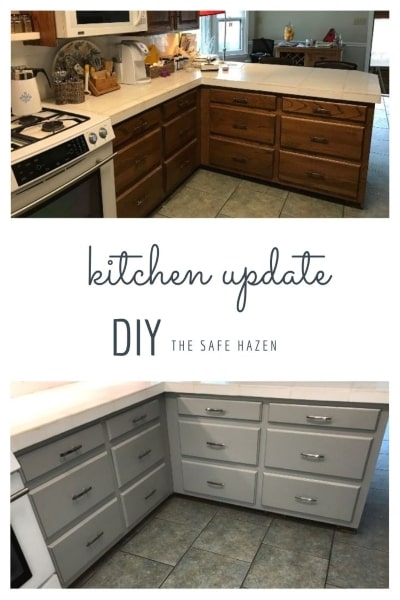
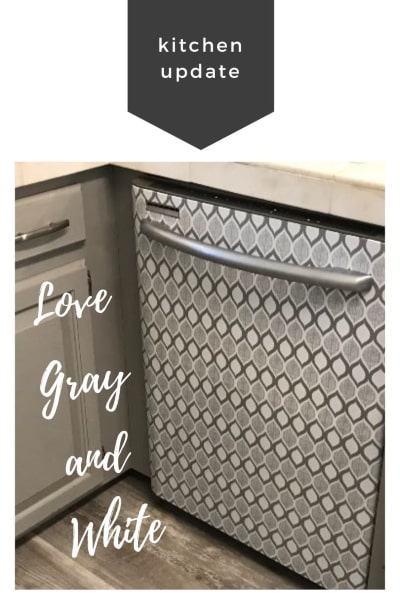
Color scheme. We chose grey for the bottom cabinets and white for the upper cabinets. I’ve got news for you – – there are many variations on these two basic colors! Take into careful consideration the color of your flooring and that of your countertops and backsplash (whether leaving as-is or replacing). We wanted to keep our “white” marble counter tops and backsplash, so we had to match the upper cabinets as best we could.
The marble had a warm tone to it, and we brought home several small “tester” cans that were not right, until we were finally satisfied with the match. Do not make the mistake of buying a gallon of enamel on your first pass! A gallon can be expensive, and if you’ve got the wrong shade you will be sorry!
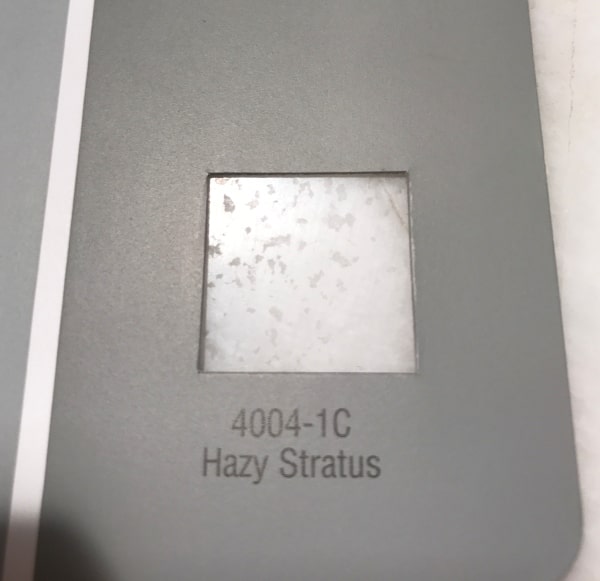
We chose Valspar Hazy Stratus (4004-1C). If you love this color and want to emulate, be cautioned that Valspar may have changed the “name” of this color (just be sure and get the same number).
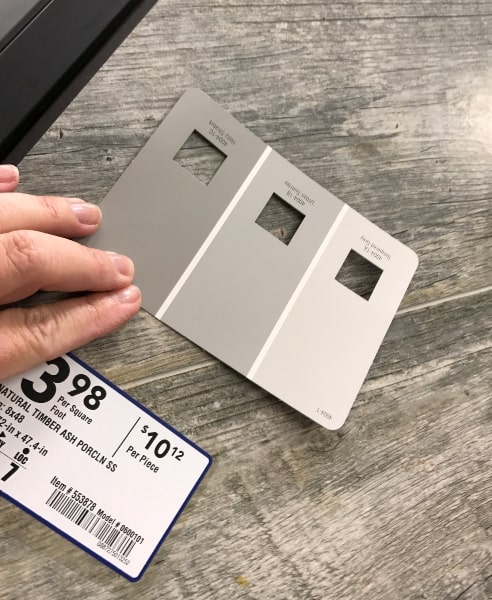
Here is a photo of me comparing the paint swatch to flooring samples at Lowe’s:
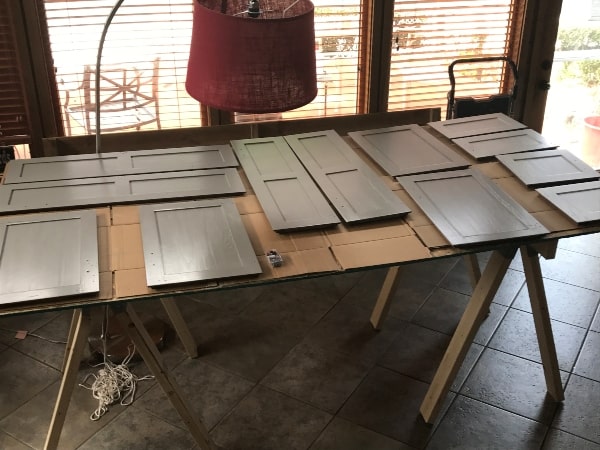
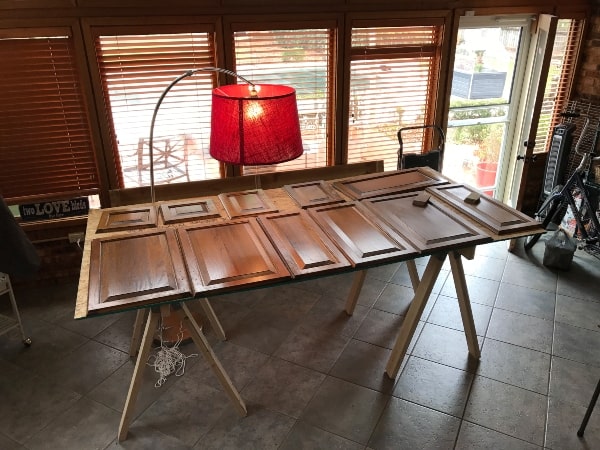
Workspace. Where will you sand and paint? You will need at least 25 square feet of workspace in order to “spread out” and work on multiple doors or drawers at once. For sanding and painting the cabinet doors I set up two sawhorses with a large piece of plywood in between (makeshift worktable). I topped my rough, wooden worktable with collapsed boxes in order to protect my newly painted surface from scratches. Be sure your worktable is raised to a comfortable height (too high and you won’t have the leverage you’ll need to apply force when sanding surfaces; too low and you back will suffer). Another consideration is the dust-mess the sanding will make; it will be everywhere, floating to adjoining rooms, and entering your lungs as well (consider using a face mask when sanding). Also, you will need to consider the fumes the painting will produce. Be sure your workspace is well ventilated. Your workspace will also need to be well lighted. I worked in an enclosed sunporch, so I had a lot of natural light (during the day!… but trust me, you will be working into the night, so have alternate light sources at the ready!).
Time of Year/Weather. Paint reacts to tempurature and humidity.

Excessive moisture or extreme hot or cold temperatures will cause the paint to cure improperly. I didn’t know this. I began this project in March, which was cold and damp in Alabama. As it turned out we had a lot of rain and wind during the application of my first coat of enamel. I had several windows open in order to vent the room. As it turns out, humidity and wind have a distinct effect on the paint’s ability to dry properly. I found out the hard way. The moisture and wind coming through the windows made my first coat dry with hundreds of tiny air bubbles! No! I was heartbroken! I had to completely sand down the first coat and start again… this time on a day when it wasn’t raining and windy outside.
Okay, if you considered these first three parameters and you’re ready to go, let’s get started!
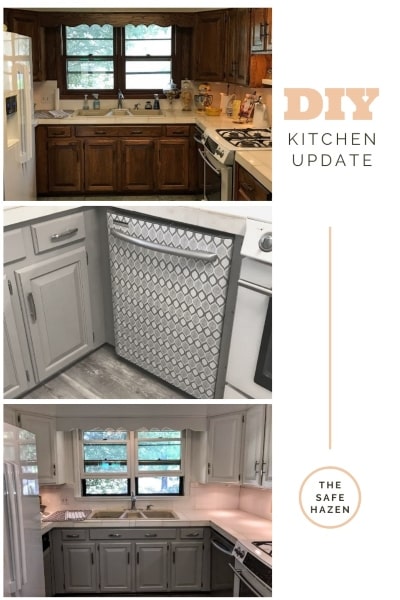
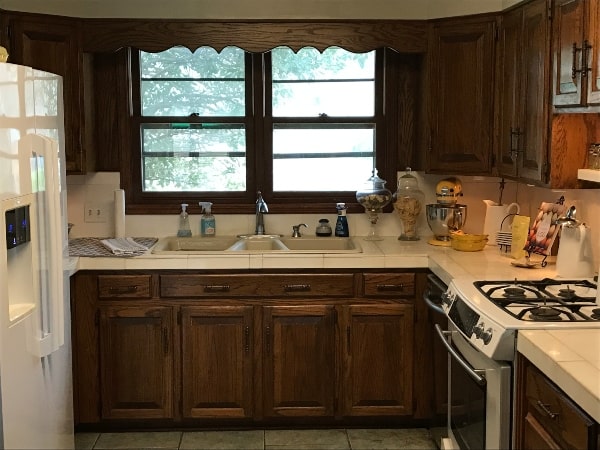
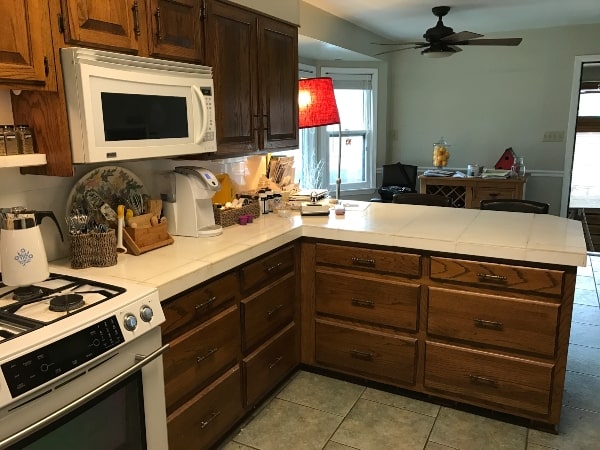
Here is our “before” 80’s kitchen theme:

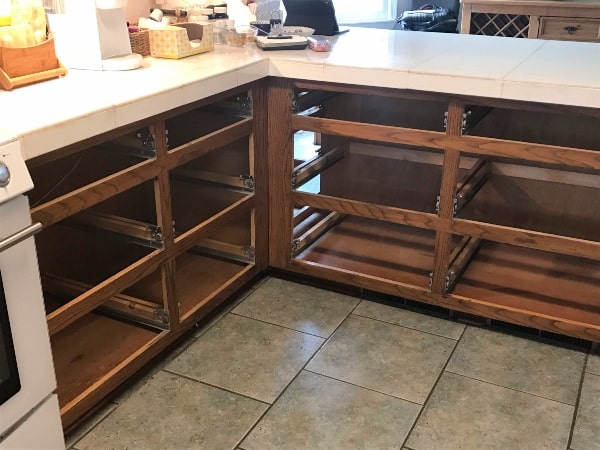
We found it to be manageable to leave most of the dishes in the upper cabinets after we removed the doors, but obviously, any drawers will have to be emptied out! However, you don’t have to take down everything at once! We worked on the upper cabinets and still lived out of the lower cabinets and drawers until it was time to take everything apart.
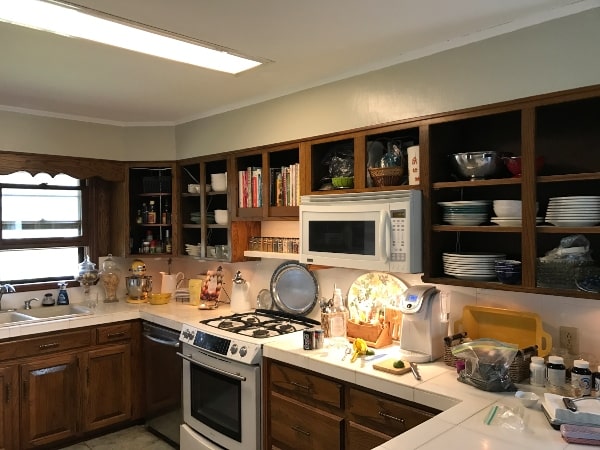
You can see, here, that we began working on the upper framing and doors first, without removing the lower cabinets and drawers. We actually finished the upper level and reinstalled the doors before moving on to the lower level (this made sense for us, because the two levels were different colors; we used white on the top and grey on the bottom).
When we got to the bottom drawers and cabinets, we put the contents of our drawers on the dining room table, which took it out of commission for about three weeks. Cooking and dining during this displacement period will be a challenge! Don’t plan it when you have a big entertaining event on the horizon!

Step #1 – Remove Cabinet Doors from Frame and Remove All Hardware.
Set up worktable.
Cover worktable with flattened cardboard boxes.
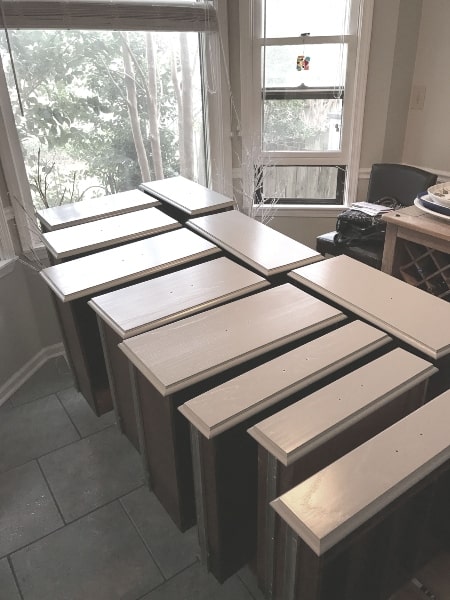
Lay out your cabinet doors on the table.
Step #2 – Prep the surfaces to be painted.
Cleaning & Degreasing. This part was the hardest part for me, because our cabinets were 30 years old, and I promise you the previous owners did not make cleaning them a priority! So, depending on how old your cabinets are (and how much kitchen grease has built up on them), this part may be anywhere from hard and very hard.
What I learned is that you cannot remove greasy buildup by sanding (not unless you want to remove the outermost layer of your wood grain along with it!) So, you must apply a degreasing agent and rub and rub with old wash cloths. There are a handful of degreasers out there, but I didn’t have any super-great luck with any that I tried. I found that I had to apply plenty of “elbow grease” of my own, in the form of gently scraping with a plastic putty knife (don’t use metal; it will gouge your wood).
Degreasing is just NOT fun. Now, if your cabinets are fairly clean in the first place, cleaning may be alright. (When I refinished the bathroom cabinets cleaning was easy… kitchens are just greasy by nature). Before moving on to sanding, be sure that any liquid degreaser is cleaned away (use a damp rag and let air dry).
Sanding. I sand by hand; I don’t use a power sander. I think it would be too strong for the soft wood grain. I prefer to use these sponge-sized, angled wedge sanders. They come in different levels of coarseness… start out with a less-course version and go up if your wood can take it, be careful not to dig into the wood and leave gouge marks.
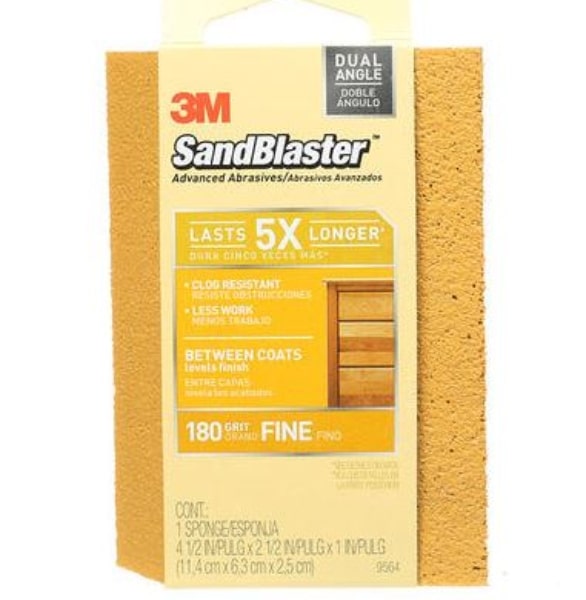
I use a cordless handheld vacuum (such as a Dustbuster) to vacuum the majority of the sand dust off of the surfaces after sanding (use the brush position on the Dustbuster so as not to scratch the wood).

If your upright vacuum has a brush attachment for furniture and small surfaces that would work as well.
Clean the rest with a microfiber cloth. You want to get all the sand dust up, as you don’t want it to mix with your enamel!
Step #3 – Paint!
This is where the work finally becomes rewarding!
Supplies Needed:
Valspar Cabinet Enamel, Semi-Gloss (I get mine at Lowes) in preferred color(s); Do not use primer as it will cover the wood grain pattern and leave brush strokes. This enamel is very durable! It has held up beautifully for three years in out home! Just wipe with a wet sponge for touch-up cleaning! (Almost no chips, bangs or dents from impact with pots and pans… we have not had to touch it up at all!)

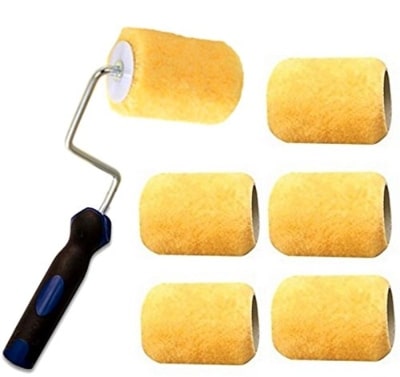
Angled brushes for cutting in (I prefer the Wooster Shortcut Angle Brush, available on Amazon, or at your favorite home improvement store or hardware).

Small roller frames (you’ll want to have more than one on hand)
Several packs of small roller covers (small nap to avoid bubbles and too much texture in enamel application)
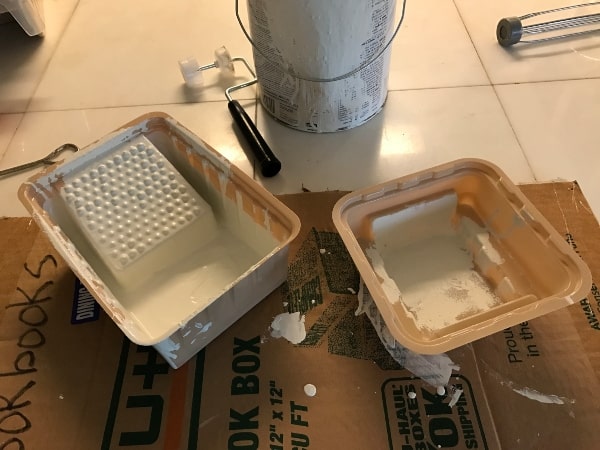
Several small paint trays (more like a “tub” in the small size) (some with the angled roller surface for use with small rollers, and some without the roller surface, for dunking your angled brush).
The paint brush will be for cutting in raised surfaces if your cabinets are not completely flat. Here you can see that my kitchen had both: raised panels on the cabinet doors and flat surfaces on the drawers.
The small rollers are for applying paint to the outer edges of the cabinets and doors, and for smoothing out the paint where you’ve cut in with a brush.
Large roller frames (you’ll want to have more than one on hand)
Several packs of large roller covers (small nap to avoid bubbles and too much texture in enamel application)
The large rollers will be used to finish off and smooth out your surface after you’ve cut in any raised trim and edges.
Small and large roller frames, roller covers and brushes often come in a kit, nestled inside a handy paint tray.

Small rags for wiping up drips from your floor and other surfaces!
Painter’s Tripods (these will be for flipping a semi-wet side over to dry atop these tripods while you work on the alternate side of the doors)

Ready? Set? Go!
Cabinet Doors
Lay out your cabinet doors on the table. Start with the inside of the doors facing up…(hey, might as well start on the side that doesn’t show when re-hung!). Leave a few inches in between each door for ease in working.
Work on one door at the time (cut in and roll) before moving on to the next door. This will keep your brush strokes from drying before you’ve smoothed it all out with a roller.
I like my “working door” to be at one of the corners of my worktable. This will be essential when we get to rolling the “edges” of the door.
1. Start by using the angled brush to cut in the raised surfaces (this means getting good paint coverage in all the nooks and crannies).
In this photo, the painter is using the roller to apply paint to the nooks and crannies. This may seem fine for a internet photograph, but it will not work well (you will not be able to sufficiently get into the nooks and crannies with a roller).

2. Use the small roller to smooth out areas where you cut in. Take care to watch for runs. PAINT RUNS. You must be diligent to look, look, and look again; go back with your brush or roller to eliminate runs and drips! While you’re working on one door keep inspecting the doors you’ve just finished, because time and gravity will bring out the runs and drips (especially in the corner of any raised panels or trim).
3. Now slide your door out over the edge of the corner of the table, so that one side edge and one end edge are hanging slightly off the edge of our worktable. Apply paint, sparingly, with your small roller to the 2 edges that are hanging off the table. Take a damp rag and wipe the edge of the surface opposite of the side you’ve just painted (the one facing the floor). This is important, because when you roll the outer edges it will leave a build-up paint rim of “overage” on the opposite side. If you don’t wipe it off at this point, you will find an annoying “ridge” of dried paint when you turn the doors over later to paint the opposite surface, and you will have to sand the ridge.
Repeat steps 1-3 for all the cabinet doors that will fit on your work surface at one time.
Allow to dry 8-12 hours before flipping over to work on the opposite sides. You may use the painter’s tripods to perch atop the not-quite-dry first side.
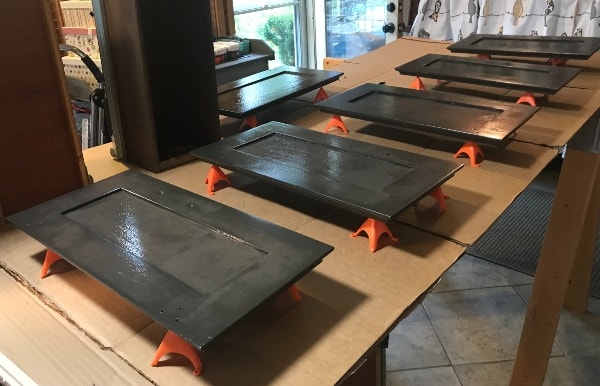
These tripods should not leave noticeable marks on the semi-wet paint. Using this method will keep your project moving.

Waiting 8-12 hours in between “flips” can really stretch out your project completion time (depending on the size of your work table).
You will need a minimum of 2 coats of enamel for all surfaces (I used 3 coats on the framing).
Framing and Windows
While your cabinet doors are in their drying stages begin work on the cabinet framing (the part you left behind in your kitchen!) …
1. Clean/Degrease
2. Sand
3. Clean sand dust
4. Tape any edges where you need a straight line of enamel.
5. Once again, do not use primer; just cabinet enamel.
6. Use your angled brush to cut in all interior corners.
7. Use the small roller to smooth out the surfaces that will face outward and show after the doors are installed.
8. We did not paint beyond the inner trim of the frame (we left the shelves and interior casing dark).

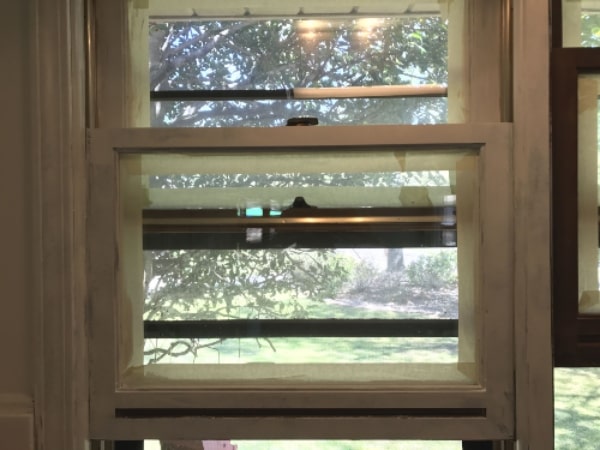
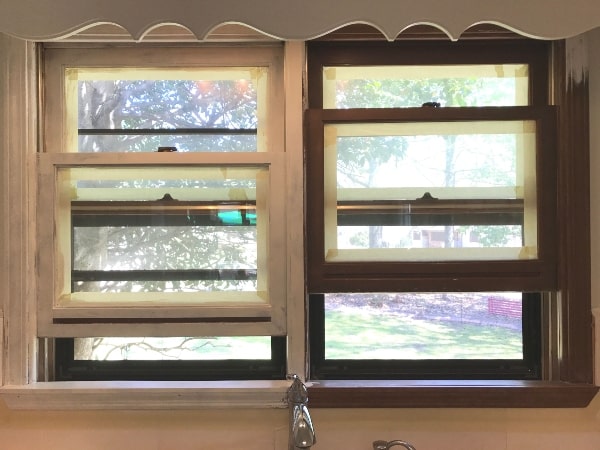
While the enamel is in its drying stage on the doors, it is a good time to get started on any window frames in the kitchen that need to match your updated cabinets.
9. Clean/Degrease
10. Sand
11. Clean sand dust
12. Tape edges of glass windowpanes to protect from stray paint marks.
13. Once again, do not use primer; just cabinet enamel.
14. Use your angled brush to cut in all interior corners.
15. Use the small roller to smooth out the surfaces.
IMPORTANT! Do not let the enamel dry in such a way that your window will no longer slide open and closed! While enamel is in the drying stage, slide you window open and closed frequently!
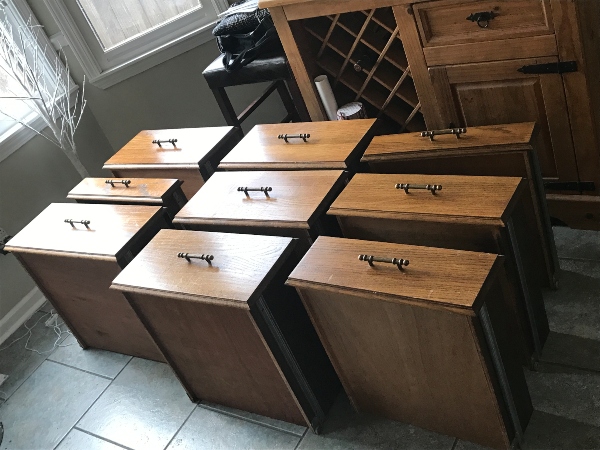
Drawers
If you have the workspace you might want to work on your drawers in between periods of drying for other components of the project!
We put the drawers on the floor and removed hardware. Then we raised them off the floor (about 1 foot) by laying wood planks across some small iron patio tables we had (this raised them off the floor to a more comfortable working position). From there I cleaned/degreased, sanded and applied enamel.

1. Start by using the angled brush to cut in any raised of angled surfaces (this means getting good enamel coverage in all the nooks and crannies).
2. Use the small roller to smooth out areas where you’ve cut in. Take care to watch for runs. PAINT RUNS. You must be diligent to look, look, and look again.
3. Take a damp rag and wipe the 4 down-facing outer edges (the one facing the floor). This is important, because when you roll the outer edges it will leave a build-up paint rim of “overage” on the opposite side. If you don’t wipe it off at this point, you will find an annoying “ridge” of dried paint that will be a glob that wants to stick to your finished framing when you re-install your finished drawers. No globs allowed! Be neat and tidy!
Allow to dry 8-12 hours before applying the next coat of enamel or applying new hardware.
You will need a minimum of 2 coats of enamel for all surfaces.
A Note on Clean-Up
The cabinet enamel is a water-based product, so clean-up after each painting session is easy. When you are ready to hang up your brushes and rollers for your painting session, clean up right away.
Pour any remaining enamel from your trays back into the can (use your brush to coax out as much as possible). Seal the enamel can with its lid and tamp down tightly with a hammer or the blunt end of a screwdriver. Do not rinse your trays! You DO NOT want to mix water with your enamel when you are ready to fill the trays for the next session. Just let a thin film of enamel dry on the inside surfaces of the tray. No problem. When your tray begins to have more interior enamel build-up than you like, toss it and start with a fresh tray.
Then clean your brushes and roller frames right away (don’t allow the paint to dry on your tools!). Just run under tap water until clean.
Taking a break and returning in a little while. If you are taking a break for a few hours, you may put your roller frame (with wet cover still on) in a plastic grocery bag to re-use later. Just put the roller in the bag and twist the ends of the bag around the handle of the roller frame (to seal out air). This will keep your roller cover and enamel from drying out for a few hours. You may do the same with wet brushes.
Hanging it up for the day. If your painting session is over for the day, don’t leave your rollers and brushes in a plastic bag over night. Rinse the brushes in water (I do this at my kitchen sink… any enamel that splashes on surrounding surfaces washes away easily). Rinse WELL, and then squeeze out excess water with paper towels and let dry. When you return for your next painting session you DO NOT want to use a damp brush (mixing water with your enamel will cause poor adhesion to the wood and will thin out the enamel to where it may not match the other cabinets).
I like to throw away my wet roller covers at the end of the day and begin with a new one the following day. This ensures that my roller cover will be DRY on the next day. You can rinse out your roller cover and reuse, but it is unlikely to dry overnight, and you won’t be able to resume with it the next day. Also, reusing covers makes the nap a little chunky and funky, so the enamel will not go on the intended surfaces as seamlessly.
Rinse the roller frames well and let air dry.
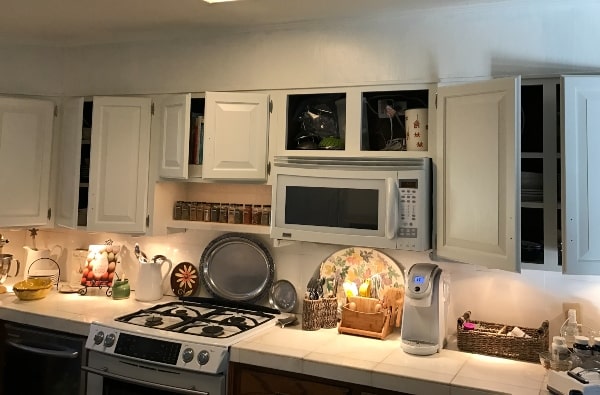
Finished Product at the Safe Hazen!
Before & After

Years ago I painted cabinets in the kitchen where we lived then. Sure wish I would have had such detailed information. Looking good!
Thanks!
GREAT JOB! My laundry room needs a HUGE makeover and all I have thought of is to paint the walls a color to go with the “orange” maple (?) tract house cabinets, except I can’t figure out what color… LOL! Maybe I should just paint the cabinets!
Exactly!
Wonderful clear instructions. I’ll use this on my next cabinet update. Thanks!!
Yay! I hope you’re able to apply these tips and strategies to a wonderful project!